Leong Jia En 0348366
Bachelor of Creative Media Design (Minor)
Digital Photography and Imaging
Project 2
Part 1: Double Exposure
In week 5, we were required to download the given portrait to learn double exposure photography. Like the lesson we learned before, we need to crop and mask the portrait, and use the refine brush tool to optimize the details. Then, place the image (forest) on the desired area (face) and mask it for creating double exposure. Use a black brush to erase unwanted areas and vice versa with white brush. Followed by importing other materials such as birds and cloud image and use Darken/Multiply blend mode to remove the white background. Additionally, we can apply the gradient map to create better results.
Project 2
Visual Research
 |
| https://pin.it/7CWiiXF |
Progress
After researching three of our favorite visual references for double exposure photography, we were taken to the studio to shoot our own portraits. We split into groups of three and helped each other take pictures with a camera or phone. We tried several poses and angles, such as front and side to choose better results.
 |
| Portrait in Studio |
Then, I went to Pinterest to collect background images with high resolution. I chose city image that was inspired during the research process.
Below is my process step in Adobe Photoshop:
1. Click Object Selection tools
2. Click "Select Subject" and "Select and Mask" at the Option bar
3. Under "Select & Mask": Adjust View Mode to Overlay & adjust opacity, Use “Refine Edge Brush Tool" to brush hair and eyelashes, Use “Brush Tool” to clean the background
4. Select Layer with Layer Mask and Click OK
5. Create a new layer and add solid colour
 |
| Clipping mask |
6. Apply black and white effect
7. Add Curve adjustment layer and make S curve
 |
| B&W, Curve |
8. Position chosen city image on my portrait
9. Select clipping mask, Use eye dropper to choose grey sky colour on Solid Colour
10. Unmask my face by using brush tool and foreground colour
 |
| Mask city image |
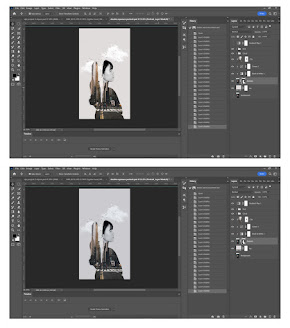
11. Add birds and clouds’ image and use multiply mode to remove white background
12. Add gradient map fill layer and adjust opacity
 |
| Birds & clouds, Gradient map |
13. Done!
The clothes on the lower part of the body are not smooth and can be refined by cropping or using brush.
Part 2: Photo Manipulation
In part 2, we were required to find 2 objects in our surroundings to manipulate them into one unique thing.
Requirements:
- Illusion that is created by a combination of 2 objects.
- Pinterest to view lots of photo manipulation works, pins them.
- Find objects in your surrounding that you can use for the project.
- Sketch your idea.
Visual Research
Idea Exploration
Based on the research above, I came up with 5 ideas for combining items I found around, including a camera lens with sushi or an alarm clock, a ping pong racket with egg, a camera with a phonograph record or sushi, perfume with a golf ball and chili with lighter.
Feedback
The first and third ideas work, but the idea is too general. While the second idea is not feasible because the two things cannot be combined into one, the fourth idea does not look very different from ordinary perfume. The last idea is approved.
Progress
In order to cut out objects easily in Photoshop, I shot with white background wall and use white paper as the bottom. I also used white light to illuminate the objects for clearer quality.
Below is my process step in Adobe Photoshop:
1. Use Object Selection tools to select the head of a lighter
2. Add clipping mask
4. Add clipping mask and adjust by using Brush Tool.
6. Add a new layer and apply solid colour to create a background.
9. Add clipping mask.
10. Use Lighten blending mode.
Final Outcome
A magical lighter with the body of a chili, it looks like a chili in appearance, but when opened, it is a lighter that can help ignite things. The hot chili can generate heat to help burn, creating a scorching flame.
Reflection
Week 6- Week 9
This project was a great learning experience as I gained more editing skills in Photoshop that I am sure will help me in my future work. The most fun part of creating a double exposure portrait is photo shooting in a studio, and I enjoy the moments of exploring various styles to create meaningful and aesthetic portraits. I also enjoyed the objects combination project, it is fun to turn two objects into one unique and creative thing with meaning and logic. While it is hard to think about which objects to combine in my surroundings, it is incredibly satisfying to successfully create a unique piece.


Comments
Post a Comment